If you’re planning a kitchen remodel, upgrading appliances, or simply tired of a broken unit taking up space, trash compactor removal is a project you’ll eventually have to face. While it might seem as simple as pulling it out and hauling it away, there are safety, environmental, and financial angles to consider. Done right, you can protect your home, avoid injuries, stay on the right side of local regulations, and maybe even make some money.
This guide walks you step by step through how to remove, dispose of, recycle, or sell a trash compactor, with practical tips for both built-in and freestanding models.
Step 1: Decide whether to repair or remove
Before you jump into trash compactor removal, decide if removal is actually your best option.
Ask yourself:
- Is the unit relatively new (under 8–10 years)?
- Does it just need a simple repair (like a switch, fuse, or foot pedal)?
- Does it still match your kitchen design and layout?
If the answer is yes to most of these, it may be cheaper and more sustainable to repair rather than replace. Simple fixes—such as replacing the drive belt or start switch—are often far less expensive than buying a new appliance and paying for haul-away.
However, removal is usually the right choice if:
- Parts are no longer readily available
- The motor or ram system has failed
- You’re redesigning the kitchen layout (e.g., adding a cabinet or beverage cooler)
- You’ve stopped using the compactor and want storage space instead
Once you’re sure the unit is at the end of its life for your home, you can move on to safe removal.
Step 2: Prepare for safe trash compactor removal
Trash compactors combine electricity, sometimes hardwiring, heavy components, and sharp internal parts. Preparing correctly reduces risk.
Gather tools and supplies
You’ll typically need:
- Work gloves and safety glasses
- Flathead and Phillips screwdrivers
- Adjustable wrench or socket set
- Pliers
- Voltage tester (for hardwired units)
- Dolly or hand truck (for heavy units)
- Moving straps or a helper
- Painter’s tape or masking tape (to secure loose parts)
Clear the area
Make sure you have:
- A clear path from the compactor to the door
- Protective covering over nearby flooring if you’re worried about scratches
- Pets and children kept away from the work area
Shut off power
This is crucial.
For a plug-in unit:
- Open the cabinet or pull out the drawer to access the outlet.
- Unplug the compactor from the wall.
For a hardwired unit:
- Turn off the corresponding breaker at your electrical panel.
- Use a voltage tester on the wiring inside the access panel to confirm power is off.
Never attempt trash compactor removal while the unit is still energized.
Step 3: Remove a built-in trash compactor
Built-in compactors are usually framed by cabinetry and anchored to keep them from shifting. Removing them is straightforward if you know the steps.
1. Remove the drawer and bin (if possible)
- Open the trash compactor fully.
- Lift the drawer slightly and pull it up and out (many models lift off rails).
- Remove the internal bin or container to reduce weight.
This makes the unit lighter and less awkward to maneuver.
2. Detach the front kick plate and trim
- Look along the bottom front of the compactor for screws holding the kick plate in place.
- Remove the screws and pull off the plate.
- If there is decorative or custom trim, remove it carefully to avoid damaging cabinets.
3. Locate and remove mounting screws
Most built-ins are secured to surrounding cabinetry or the underside of the countertop:
- Check inside the compactor opening and along the top front frame for screws.
- Remove screws attaching the compactor to the cabinet or countertop.
- If the unit is sitting on shims or a leveling base, note their placement—they may be useful if you’re installing a replacement appliance.
4. Disconnect electrical wiring (for hardwired units)
If the unit is hardwired instead of plugged in:
- Remove the rear or bottom access panel.
- Confirm the power is off with your voltage tester.
- Carefully disconnect the wire nuts connecting the compactor wires to the household wiring.
- Cap the house wires with new wire nuts and secure them in a junction box, if required by code.
If you’re not comfortable with electrical work, hire a licensed electrician for this step.
5. Slide the unit out
With screws removed and power disconnected:
- Gently rock the compactor forward to loosen it.
- Slide it out from the cabinet cavity, using a helper if necessary.
- Use a dolly or hand truck to move it safely to your garage, driveway, or staging area.
Step 4: Remove a freestanding trash compactor
Freestanding units are simpler, but still require care.
- Unplug the power cord.
- Remove any bags, bins, or internal racks to reduce weight.
- Secure the door or drawer shut with tape or a moving strap to prevent it from swinging open.
- Use a dolly to roll the compactor out of your home, protecting floors along the path.
Even “portable” compactors can be quite heavy due to the motor and compression assembly, so avoid lifting alone if you can.
Step 5: Decide what to do with your old trash compactor
Once you complete trash compactor removal, you have four main options:
- Recycle
- Dispose (bulk trash, landfill)
- Sell
- Donate or give away
Option 1: Recycle your trash compactor
Recycling is often the most environmentally responsible choice. Compacting mechanisms and housings contain:
- Steel and other metals
- Wiring and electronic components
- Sometimes reusable hardware or motor parts
Check locally for:
- Municipal appliance recycling programs
- Private scrap metal recyclers
- Retailer haul-away and recycling services when you buy a new appliance
Some municipalities or retailers offer rebates or free haul-away on old appliances that are recycled instead of landfilled. The U.S. Environmental Protection Agency highlights the benefits of recycling appliances to conserve materials and reduce environmental impact (source: EPA – Responsible Appliance Disposal).
Before recycling:
- Remove trash bags or loose waste.
- Wipe out obvious food spills to avoid odors in your vehicle.
- Secure any movable parts with tape.
Option 2: Bulk trash pickup or landfill disposal
If recycling isn’t available:
- Contact your local waste management provider to ask about bulk pickup rules. Many cities require scheduling a special pickup for large appliances.
- Confirm whether they accept trash compactors as-is or require disassembly (removal of motor or electronics).
- Be aware of any fees or restrictions in your area.
Never dump appliances illegally. Beyond fines and legal risks, improper dumping harms local environments and neighborhoods.
Option 3: Sell your old trash compactor
If your unit still works, selling can offset your replacement costs.
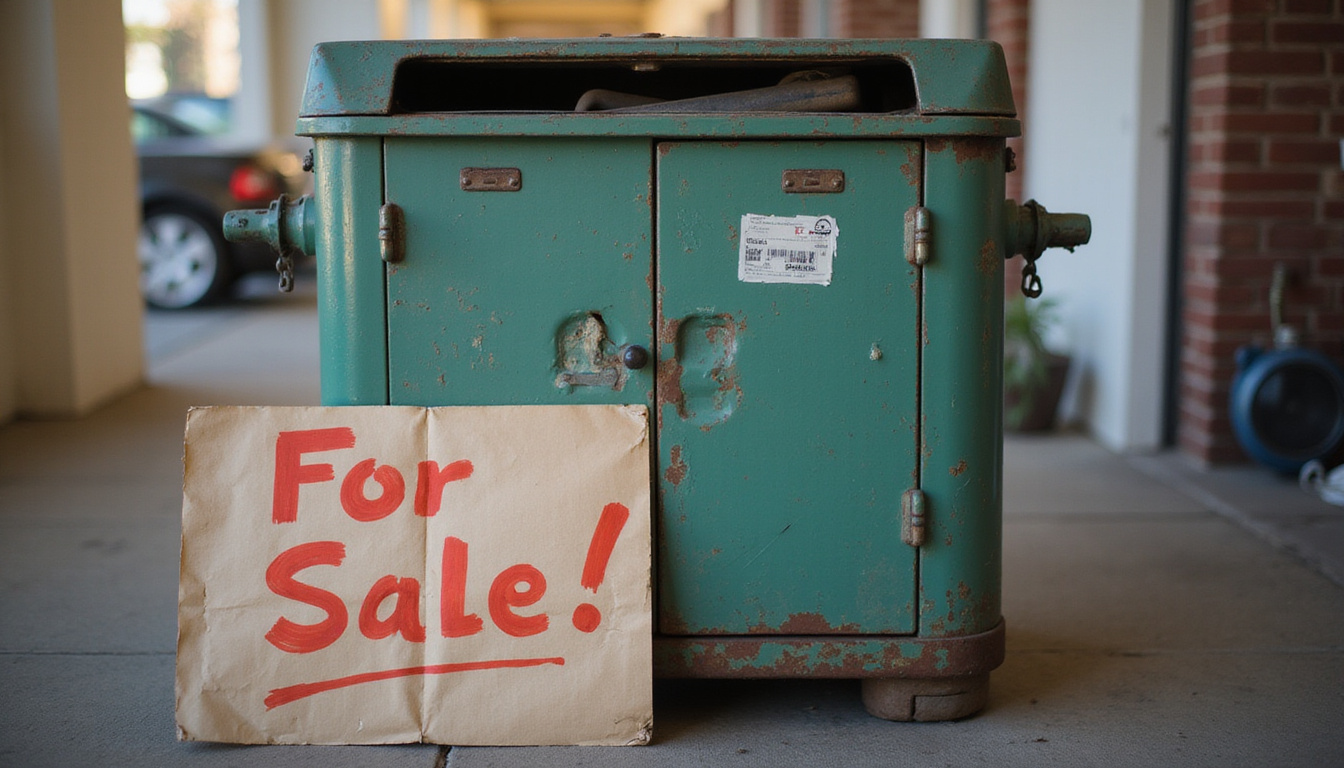
Factors that help a successful sale:
- Brand & model: Premium brands and stainless steel fronts tend to sell faster.
- Condition: No leaks, no grinding noises, and a functioning ram are key.
- Age: Under 10–12 years old is often the sweet spot, depending on market.
Places to list:
- Online marketplaces (Facebook Marketplace, Craigslist, OfferUp)
- Local buy/sell or neighborhood groups
- Appliance refurbishers or used appliance stores
In your listing, include:
- Clear photos from multiple angles
- Model number and approximate age
- Dimensions (especially important for built-in units)
- Any included accessories or custom panel fronts
Price aggressively if you want it gone quickly; most buyers know they’re taking on a niche appliance.
Option 4: Donate or give it away
If selling isn’t worth the effort but the unit works:
- Offer it for free on local community boards or “Buy Nothing” groups.
- Ask local charities, churches, shelters, or community centers if they accept working appliances.
Always disclose any known issues and provide basic operation instructions.
Step 6: Prepare the cavity or space after removal
Once trash compactor removal is complete, you’ll need to address the gap it leaves—especially for built-in units.
For future appliance installation
If you’re installing a new trash compactor, beverage cooler, or dishwasher:
- Clean the cavity thoroughly, removing dust, crumbs, and any debris.
- Inspect the flooring for damage or rot and repair if needed.
- Measure the width, height, and depth accurately to ensure your new appliance will fit.
- Confirm electrical and, if applicable, plumbing connections are safe and up to code.
This is the ideal time to upgrade an old outlet, add a shutoff valve (if converting to a dishwasher), or re-run wiring.
Converting the space to a cabinet
If you’re eliminating the compactor altogether:
- Consult a cabinet maker or carpenter to build a matching door and interior shelves.
- Use a filler panel if necessary to bridge gaps or odd dimensions.
- Consider using the space as a pull-out trash and recycling center—a popular modern alternative to compactors.
Safety tips to keep in mind
To keep your trash compactor removal project safe and smooth:
- Never work on a powered unit. Always disconnect from the power source first.
- Avoid placing fingers near internal mechanisms like the ram or gears.
- Use proper lifting techniques; bend at your knees and keep your back straight.
- Wear gloves and eye protection to safeguard against sharp metal edges.
- Don’t disassemble the motor or hydraulic components unless you’re experienced—this can be hazardous and often offers little benefit for basic disposal.
Quick checklist: Trash compactor removal and next steps
Use this simple checklist to stay organized:
- Decide: repair, replace, recycle, or sell?
- Turn off power (unplug or shut off breaker).
- Clear the area and gather tools.
- Remove drawer/bin and front panels.
- Detach mounting screws and trim.
- Disconnect wiring (for hardwired units).
- Slide unit out using a helper or dolly.
- Choose disposal method: recycle, bulk trash, sell, or donate.
- Clean and inspect the empty space.
- Install new appliance or convert to cabinet/storage.
FAQ about trash compactor removal, disposal, and recycling
1. How much does trash compactor disposal usually cost?
Costs vary by location and method. Municipal bulk pickup may be free or charge a small fee (often $20–$50). Private junk removal services can range from $75–$150 depending on whether they’re taking only the compactor or additional items. If you bring it to a scrap yard, they might accept it at no charge—or even pay a small amount for the metal.
2. Can you recycle an old trash compactor with other kitchen appliances?
Yes. Many appliance recycling programs accept trash compactors along with refrigerators, dishwashers, and ovens. Check in advance because some programs focus only on units containing refrigerants (like fridges or freezers). Always remove loose trash and bags before dropping a compactor at a recycling facility.
3. Is it safe to remove a built-in trash compactor by myself?
It can be safe if you’re comfortable with basic tools, follow electrical precautions, and the unit isn’t excessively heavy for you. Always shut off power, verify with a tester for hardwired models, and avoid lifting the full weight alone. If your compactor is hardwired or tightly integrated into custom cabinetry, consider hiring an electrician or appliance installer for at least part of the job.
Turn your old trash compactor into an opportunity
Trash compactor removal doesn’t have to be stressful or expensive. With a bit of planning, you can:
- Safely disconnect and remove the unit
- Choose an eco-friendly recycling option when possible
- Potentially recoup some value by selling or donating a working appliance
- Upgrade your kitchen layout with a more useful cabinet or modern alternative
If you’re ready to reclaim that space or move forward with a kitchen update, start by assessing your current compactor and choosing the removal and disposal path that fits your home, skills, and local options. And if you’re unsure about wiring, cabinetry, or hauling, reach out to a qualified local pro—getting expert help for part of the process can turn a daunting job into a quick, hassle-free upgrade.
Junk Guys San Diego
Phone: 619-597-2299
Website: www.olive-deer-348861.hostingersite.com
Email: junkguyssd619@gmail.com